Setting Up OpenAI Gym with Anaconda 3:
- Find the Latest Gymnasium Installation Instructions: Always start by checking the most recent installation guidelines for OpenAI Gym at the Gymnasium GitHub page.
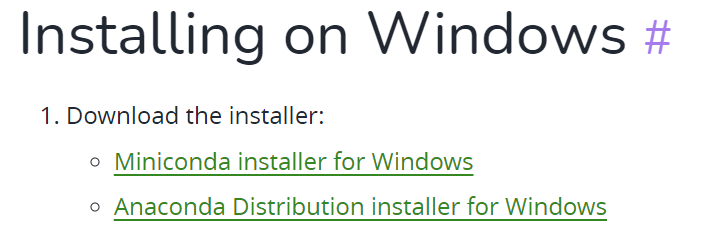
- Download Anaconda or Miniconda: To get started, download either Miniconda or the full Anaconda Distribution Installer. You can find the installer and instructions here.
- Ensure Python Compatibility: Before proceeding, verify that your Anaconda Python version is compatible with OpenAI Gym. Compatibility information can be found on the Gymnasium GitHub page.
- Installing Gymnasium Libraries: To use OpenAI Gym, you need to install the Gymnasium library. Here’s how you can do it:
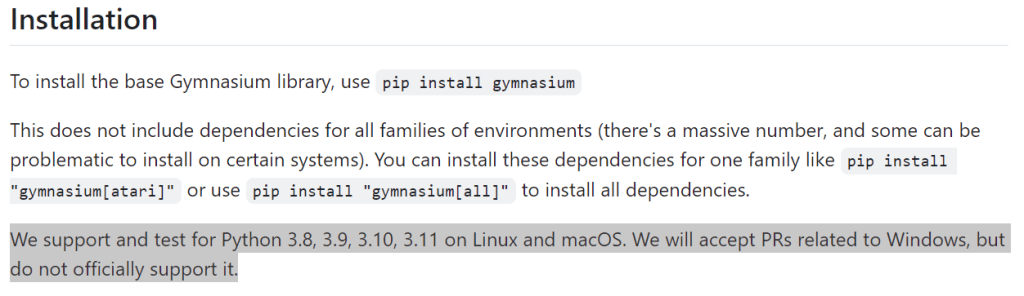
- For the base library, type $ pip install gymnasium in your terminal. This installs the core functionalities but might not include everything.
- To get all the dependencies for every environment available, use $ pip install “gymnasium[all]”.
- If you’re interested in specific environments, you can install them individually:
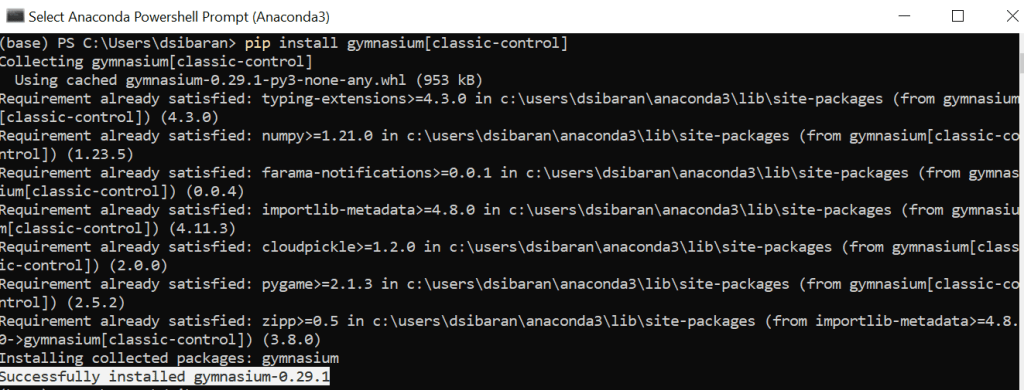
- For Classic Control simulations, use $ pip install gymnasium[classic-control].
- For working with Mujoco, type $ pip install gymnasium[mujoco].
- For Atari games, you’ll need two commands: $ pip install gymnasium[atari] and $ pip install gymnasium[accept-rom-license].
- For Box2D environments, first ensure you have SWIG installed ($ pip install swig), which is necessary for Box2D. Then, install Box2D itself with $ pip install gymnasium[box2d]. Before installing Box2D, make sure you have the Visual C++ Build Tools, which can be found here (https://visualstudio.microsoft.com/visual-cpp-build-tools/).
Additional Notes:
- Why Install SWIG and Visual C++ Build Tools for Box2D? SWIG and Visual C++ Build Tools are prerequisites for installing Box2D because they allow Python to interface with the C++ code that Box2D is written in. Without these tools, the installation of Box2D would fail due to the inability to compile the necessary components.
- Why Accept ROM License for Atari? The Atari environments require you to accept the ROM license because these games are copyrighted material. By installing the gymnasium[accept-rom-license] package, you acknowledge and agree to the terms of using these ROMs for development and research.
This guide simplifies the process of setting up OpenAI Gym using Anaconda 3, ensuring you have all the necessary tools and libraries to start experimenting with various environments in Gymnasium. Following this introduction, the next paragraphs will delve into the details of the steps outlined above. Each step, from checking the latest installation guidelines on the Gymnasium GitHub page to installing specific environment dependencies, will be explored in depth. This detailed breakdown is designed to provide you with a comprehensive understanding of how to successfully set up OpenAI Gym using Anaconda 3, ensuring a smooth and efficient start to your AI and machine learning projects.
1. Find the Latest Gymnasium Installation Instructions
The first step involves visiting the Gymnasium GitHub page to check for the most recent installation guidelines. This is crucial because software and libraries are constantly updated, and following the latest instructions ensures compatibility and access to new features. The GitHub page will have a section dedicated to installation, where you can find commands and any prerequisites needed before you install the Gymnasium library. At the time this article was written, Gymnasium did not officially support Windows. However, manual installation offers a straightforward solution for Windows users to get started with ease.
2. Download Anaconda or Miniconda
In this guide, our focus is squarely on assisting Windows users with the Anaconda installation process, which mirrors the steps you would follow for Miniconda, to ensure a frictionless setup. You can find the installer with ease by visiting the official Conda guide here, specifically designed for Windows users. Although Anaconda and Miniconda are versatile tools that support various operating systems including macOS and Linux, this tutorial is crafted with Windows users in mind. Our goal is to simplify the process for those looking to dive into OpenAI Gym on a Windows platform. By choosing a Python distribution that best suits your project’s needs and personal preferences, you’re laying a solid foundation for a successful and efficient journey into the world of OpenAI Gym on your Windows machine.
3. Ensure Python Compatibility
Before proceeding with the installation of the Gymnasium library, ensuring that your Python version aligns with the versions supported by Gymnasium is a critical step. The compatibility of your Python environment with Gymnasium is fundamental to avoid any installation errors or erratic library behavior. The Gymnasium GitHub page serves as a reliable resource, listing all the Python versions that are compatible with the library.
To verify your current Python version, the process involves a few simple steps within the Anaconda environment, particularly beneficial for those who have chosen Anaconda as their Python distribution for its ease of managing different environments and packages. Here’s how you can check your Python version:
1 – Launch the Anaconda Powershell Prompt (Anaconda3): Start by opening the Anaconda Powershell Prompt, which is specifically designed for Anaconda users. This specialized prompt enhances the standard command-line experience by integrating Anaconda-specific functionalities, making it easier to manage your Python environments and installed packages.

2 – Check Your Python Version: Once in the Anaconda Powershell Prompt, you can check your Python version by executing the command python –version. This command will display the version of Python currently active in your environment, which, in this context, is referred to as the (base) environment. The (base) environment is the default Python environment that comes with Anaconda, and it’s where you’ll likely perform most of your Python-related tasks unless you’ve created and activated a different environment.
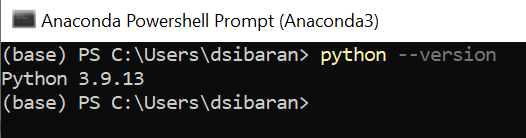
3 – Confirm Python Version Compatibility with Gymnasium: At the time of writing this post, Gymnasium officially supports Python versions 3.8, 3.9, 3.10, and 3.11. Upon checking my own setup, I found that my Python version is 3.9.13, which falls within the range of supported versions. This means that my current Python environment meets the requirements for a compatible Gymnasium installation. Ensuring that your Python version aligns with those supported by Gymnasium is essential for a seamless integration and use of the library, thereby confirming that my setup is well-prepared for the next steps in the Gymnasium installation process.

4. Installing Gymnasium Libraries
If you’re interested in specific types of environments, you can install them individually. This is useful if you want to keep your installation lightweight or if you’re only working with certain types of simulations. The commands provided install the necessary packages for classic control simulations, Mujoco, Atari, and Box2D environments. Note that for Box2D, you need to install SWIG first, which is a software development tool that simplifies the process of integrating C and C++ code with other languages. Additionally, the Visual C++ Build Tools are required for compiling some of the dependencies from source.
This step involves the actual installation of the Gymnasium library and its dependencies. Here’s a breakdown of the installation commands:
4.1. Classic Control
Check the information on: https://gymnasium.farama.org/environments/classic_control/ Command:
$ pip install gymnasium[classic-control]
4.2. Mujoco
Check the update information on https://gymnasium.farama.org/environments/mujoco/ Command:
$ pip install gymnasium[mujoco]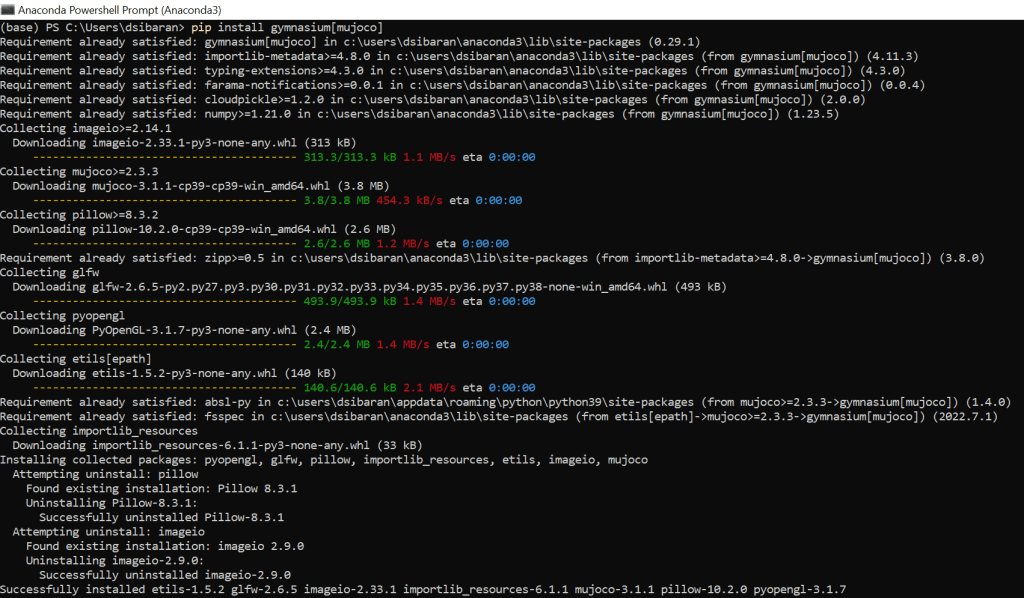
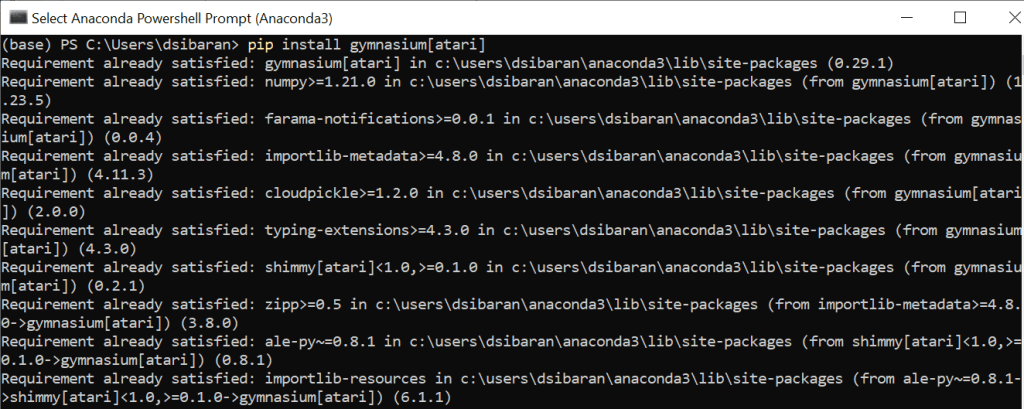
4.3. Atari
Check the update information on https://gymnasium.farama.org/environments/atari/
Command:
$ pip install gymnasium[atari]

$ pip install gymnasium[accept-rom-license]

4.4. Box2D
Check the update information on https://gymnasium.farama.org/environments/box2d/
Command:
$ pip install swig

$ pip install gymnasium[box2d]
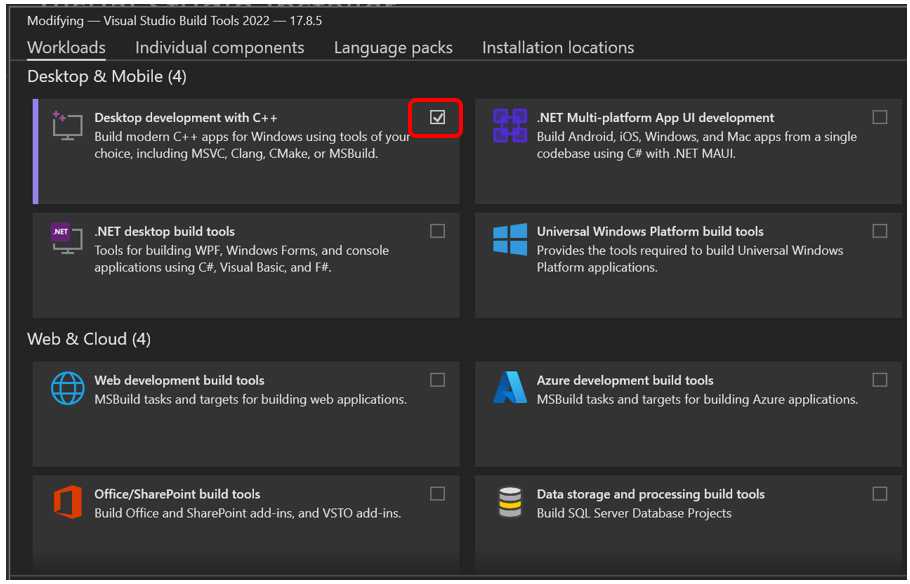
Before you can install this library Box2D, you must install $ pip install swig first, and make sure you alaready have component build tool from https://visualstudio.microsoft.com/visual-cpp-build-tools/

On the Visual Studio Build Tools, make sure you already have “Desktop development with C++”:
5. Testing
In this section of our exploration, we focus specifically on running the CartPole example from Gymnasium to demonstrate the practical application of the library:
1 – Starting with Jupyter Notebook: First, launch Jupyter Notebook to create a new interactive environment for our test. In this instance, I’ve named my notebook DRL_Testing.ipynb, which will serve as the workspace for our experiment.
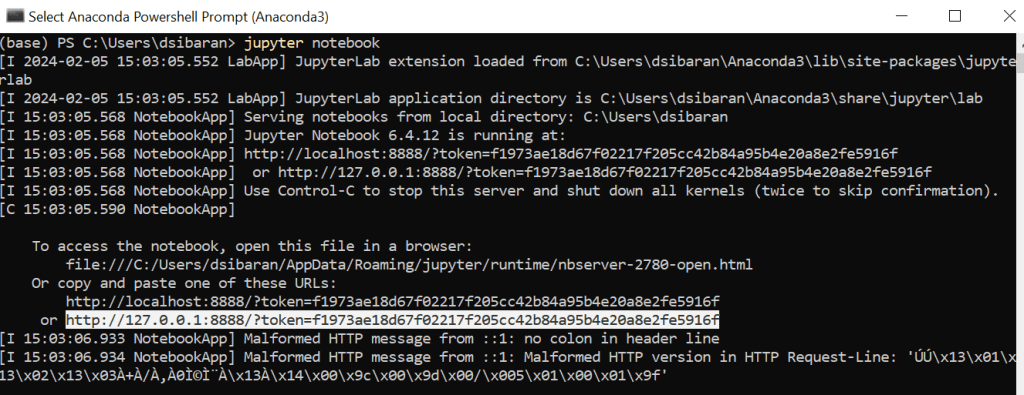
And then I create DRL_Testing.ipynb in my case:

2 – Setting Up the Notebook with Gymnasium Code: Next, navigate to the Gymnasium GitHub repository (https://github.com/Farama-Foundation/Gymnasium) to find the Python script for the CartPole example. Copy this script into the DRL_Testing.ipynb notebook you’ve just created. However, there’s an important modification to make before running the script: adjust the environment creation line to enable visual output. Change the code from:
env = gym.make('CartPole-v1')to:
env = gym.make('CartPole-v1', render_mode="human")This alteration ensures that the simulation can be viewed in an animated form, allowing you to see the CartPole in action.


3 – Executing the Script: With the script ready and the render_mode parameter set to “human“, run the script in your DRL_Testing.ipynb notebook. This action initiates the CartPole simulation, and because you’ve specified render_mode=”human”, an animation of the CartPole balancing task will be displayed. This visual representation is not just engaging but also crucial for understanding how the model’s decisions affect the pole’s balance in real-time.
If render_mode=”human” then you can see below animation:
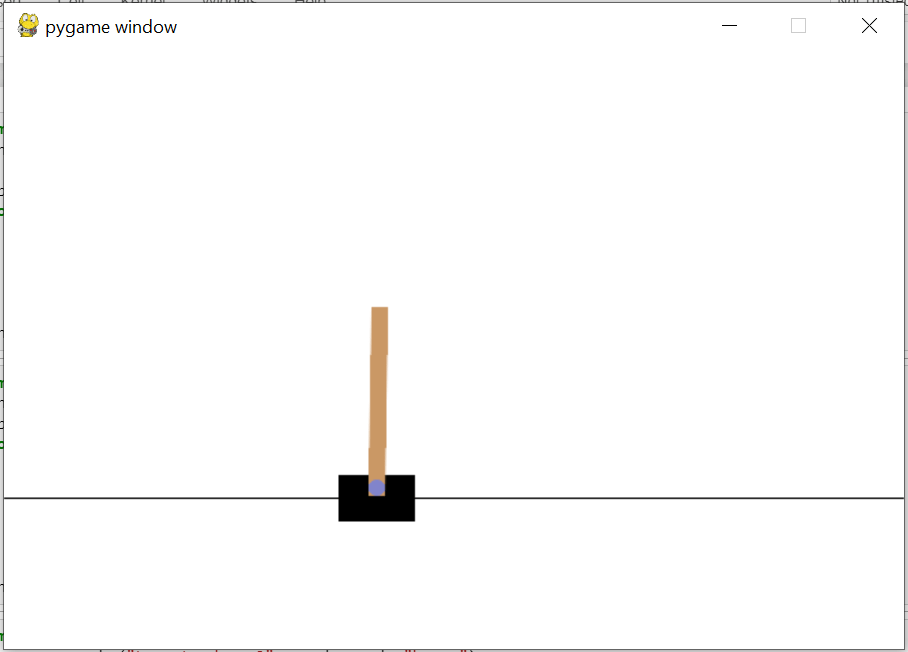
By following these steps, you’ll successfully run the CartPole example from Gymnasium in a Jupyter Notebook, providing a clear, animated insight into the dynamics of reinforcement learning models in action.
6. Common Errors Encountered
During the installation process or while trying out Gymnasium code, you might encounter certain errors. It’s important to address these issues to ensure a smooth experience. If you come across any errors not listed here, please let me know so I can update this post to help others.
6.1. Warning: Connection Broken by ConnectTimeoutError
This error typically indicates a problem with your internet connection, possibly due to restrictions or blocks implemented by your network administrator. I encountered this specific error while attempting to install the gymnasium classic-control package. The issue was resolved by switching my Wi-Fi connection, which suggests that the initial connection was indeed blocked or restricted in some way. If you face this error, it’s advisable to check your network settings, try a different network, or consult with your network administrator to ensure that your connection is not being obstructed.

And when I change the wifi connection my installation was successful:
Conclusion
In conclusion, this comprehensive guide has walked you through the essential steps to set up OpenAI Gym using Anaconda 3, tailored specifically for Windows users. From the initial step of checking the latest Gymnasium installation instructions on the GitHub page to downloading Anaconda or Miniconda, ensuring Python compatibility, and installing the necessary Gymnasium libraries, each phase has been designed to equip you with the tools needed for a successful setup.
We’ve also delved into testing with the CartPole example to demonstrate the practical application of Gymnasium, highlighting the importance of modifications like adding render_mode=”human” for visual feedback.
Moreover, the guide addressed potential errors you might encounter, such as the “Connection Broken by ConnectTimeoutError,” providing solutions to overcome these hurdles. This not only prepares you for a smooth installation process but also ensures you’re well-equipped to troubleshoot common issues that may arise.
By following the detailed instructions and tips provided, you’re now ready to embark on your journey into the exciting world of AI and machine learning projects using OpenAI Gym. Whether you’re a seasoned developer or new to the field, this guide aims to streamline your setup process, allowing you to focus on developing and testing reinforcement learning algorithms in various environments offered by Gymnasium. Remember, the field of AI is ever-evolving, and staying updated with the latest versions and supporting documentation is key to leveraging the full potential of OpenAI Gym. Happy coding, and may your exploration of AI through Gymnasium lead to insightful discoveries and innovations.
